How to Quickly Set Up Your Own AmneziaWG2 Server on a VPS
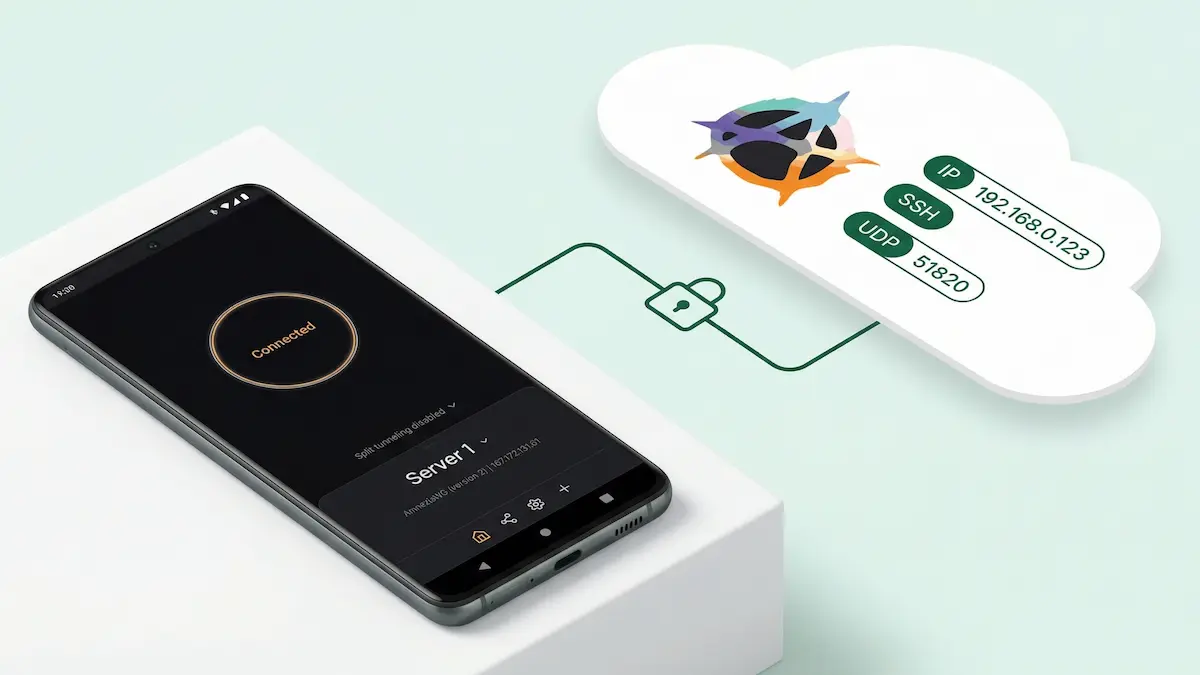
If you want the fastest path to your own VPN server without manually doing a full console setup, the self-hosted flow in Amnezia is one of the easiest options. You create a VPS, give the app SSH access, choose a protocol, and the client connects to the server and installs everything it needs on its own.
In this guide, the main walkthrough uses DigitalOcean, because it is the most straightforward option. Below, I also break down what to do if you use AWS, Azure, or Google Cloud Platform — especially when it comes to SSH keys and opening the right port.
One important clarification up front: in some parts of the Amnezia interface, you may only see Amnezia WireGuard without a version number. But in the current self-hosted flow on supported client versions, what you end up deploying is AmneziaWG 2.0.
Quick route
If you do not need the details, the whole flow looks like this:
- create a VPS;
- prepare an SSH key;
- add the public key to your hosting provider;
- copy the private key, IP, and username;
- install Amnezia;
- choose Self-hosted VPN;
- paste the IP, username, and private key;
- choose Manual → Amnezia WireGuard;
- set the port;
- wait for the installation;
- connect and verify that your IP has changed.
Below is the proper step-by-step version.
What you need
- a VPS with a public IP
- SSH access to the server
- an SSH key
- the Amnezia app installed
- 3–5 minutes
Public key vs private key: do not mix them up
This is the most common source of errors.
When you generate an SSH key, you get a pair of files:
- private key — the secret key that stays only with you;
- public key — the key you add to your provider panel.
In the usual setup:
- the file with the
.pubextension is the public key; - the file without
.pubis the private key.
In practice, this means:
- on DigitalOcean and often on Google Cloud, you upload the public key;
- in Amnezia, you paste the private key;
- on AWS and Azure, the portal may generate the keys for you, so the flow is a bit different — more on that below.
DigitalOcean: the easiest scenario
For this type of guide, DigitalOcean really is one of the easiest choices.
Step 1. Create an SSH key
If you already have a separate SSH key for this server, great — use it. If not, create a new one.
Basic command:
ssh-keygenAfter that, the system will show where it saved the keys. What you need next is the public key, meaning the file with .pub.
To print it in the terminal and copy it:
cat ~/.ssh/KEY_NAME.pubIf you kept the default name, the path will usually look like this:
cat ~/.ssh/id_ed25519.pubStep 2. Add the public key to DigitalOcean
On DigitalOcean, the public key is uploaded to your account and then attached to the new droplet during creation.
Official path: DigitalOcean Control Panel → Settings → Security → Add SSH Key
Official instructions:
- Add SSH keys to a team: https://docs.digitalocean.com/platform/teams/how-to/upload-ssh-keys/
- Create a Droplet: https://docs.digitalocean.com/products/droplets/how-to/create/
- Add SSH keys to new or existing Droplets: https://docs.digitalocean.com/products/droplets/how-to/add-ssh-keys/
You do not even have to leave the droplet creation page: there is a New SSH Key button there that does the same thing.
Step 3. Create the droplet
For a first deployment, this is enough:
- Ubuntu
- any basic plan
- SSH key authentication
- the public key you created
Once the droplet is ready, you will need:
- the public IP
- the username
- your private key
On DigitalOcean, the default username for a typical Ubuntu droplet is root.
Install Amnezia
While the VPS is being created, you can download the client right away.
Download page: https://amnezia.org/
Amnezia has versions for:
- Windows
- macOS
- Linux
- Android
- iOS
Install the app, launch it, and press Let’s get started.
Setting up self-hosted AmneziaWG2
Step 1. Choose Self-hosted VPN
Inside the app, choose:
Self-hosted VPN
Then you will need three things:
- the server IP
- the username
- the private SSH key
Step 2. Paste the private key
Here you need the private key, not the .pub file.
For example, if your public key is:
~/.ssh/id_ed25519.pubthen the private key will usually be:
~/.ssh/id_ed25519You can print it like this:
cat ~/.ssh/id_ed25519Copy the full contents and paste them into Amnezia.
Step 3. Enter the username
On DigitalOcean, this is usually:
rootOn other providers, the username may be different, so do not auto-fill root everywhere.
Step 4. Enter the IP
Copy the VPS public IP from your provider panel and paste it into Amnezia.
Step 5. Choose Manual → Amnezia WireGuard
Next, the app will ask for the installation type. Choose:
- Manual
- then Amnezia WireGuard
This is where people often get confused by the naming: the interface may not explicitly say “version 2”, but in the current self-hosted flow this is AWG 2.0, as long as your client supports the newer version.
Official self-hosted AmneziaWG 2.0 instructions: https://docs.amnezia.org/ru/documentation/instructions/new-amneziawg-selfhosted/
Step 6. Set the port
The video uses port 8080, and for a practical first setup that is a perfectly reasonable choice.
What matters here:
- this is the VPN server port, not the SSH port;
- if the protocol does not come up, the problem is often not the protocol itself but the fact that the port is closed;
- if a specific port does not work, it is usually faster to try another one first than to immediately start digging for a complicated network cause.
Official troubleshooting for self-hosted AmneziaWG: https://docs.amnezia.org/troubleshooting/self-hosted-amneziawg-not-working/
They explicitly suggest trying another port below 9999, such as 585 or 1234, if you run into issues.
Step 7. Wait for the automatic installation
After that, Amnezia will:
- connect to the server over SSH;
- install everything it needs;
- prepare the configuration;
- add the connection inside the app.
That is the main advantage of the self-hosted flow: you do not have to install everything manually from the console.
Step 8. Connect and verify the IP
Once the installation is complete, you will see a Connect button.
Then:
- press Connect;
- wait for the tunnel to come up;
- open any IP-check service;
- refresh the page and verify that the IP now matches your VPS.
If the IP changes to your server IP, the basic setup is done.
What if you are not using DigitalOcean?
Below is a short practical summary for other common providers.
AWS: SSH keys and port
On AWS EC2, the flow is different from DigitalOcean.
SSH keys on AWS
On AWS, you do not have to generate an SSH key locally ahead of time. When you create an EC2 instance, you can:
- select an existing key pair;
- or create a new key pair directly in the console.
When you create a new key pair, AWS lets you download the private key (for example, a .pem file) one time. The public key is then attached to the instance automatically.
Official documentation:
So on AWS, the easiest path is:
- create the key pair in the EC2 launch flow;
- download the private key;
- use that private key in Amnezia.
Where to open the port on AWS
On AWS, you need a Security Group with an inbound rule for the required UDP port.
Path: EC2 → Instance → attached Security Group → Edit inbound rules
Official documentation:
- Change security groups: https://docs.aws.amazon.com/AWSEC2/latest/UserGuide/changing-security-group.html
- Security group rules reference: https://docs.aws.amazon.com/AWSEC2/latest/UserGuide/security-group-rules-reference.html
If the inbound UDP rule is missing, the server may install successfully, but outside connections will not work.
Azure: SSH keys and port
On Azure, the flow is also fairly convenient.
SSH keys on Azure
Azure can generate and store SSH keys directly in the portal. That is useful if you do not want to create a key locally first.
Official documentation:
- Generate and store SSH keys in Azure portal: https://learn.microsoft.com/en-us/azure/virtual-machines/ssh-keys-portal
- Connect to a Linux VM: https://learn.microsoft.com/en-us/azure/virtual-machines/linux-vm-connect
So on Azure, you have two options:
- use your existing public key;
- let Azure generate the keys when creating the VM.
In both cases, what Amnezia ultimately needs is the private key.
Where to open the port on Azure
On Azure, opening the port usually happens through:
- Networking
- and/or Network Security Group (NSG)
Official documentation:
- Network security groups overview/tutorial: https://learn.microsoft.com/en-us/azure/virtual-network/tutorial-filter-network-traffic
- NSG management: https://learn.microsoft.com/en-us/azure/virtual-network/manage-network-security-group
In practice, you need an inbound rule for your UDP port.
Google Cloud Platform: where people get confused most often
This is where the most non-obvious issues tend to show up.
SSH keys in GCP
Google Cloud has two different SSH access models:
- OS Login
- metadata-based SSH keys
That is exactly why GCP often creates the feeling that “the keys are hidden somewhere.”
If OS Login is not being used, you can add the public SSH key:
- either in project metadata,
- or in instance metadata for a specific VM.
Official documentation:
- Add SSH keys / access overview: https://docs.cloud.google.com/compute/docs/access
- Troubleshooting SSH errors: https://docs.cloud.google.com/compute/docs/troubleshooting/troubleshooting-ssh-errors
If you only need SSH for one specific VM, using instance metadata is usually more convenient than adding the key at the project level.
Where to open the port in GCP
On Google Cloud, you do not primarily open the port “inside the VM.” The main control point is VPC firewall rules.
Official documentation:
- Firewall rules overview: https://docs.cloud.google.com/firewall/docs/firewalls
- Using firewall rules: https://docs.cloud.google.com/firewall/docs/using-firewalls
In practice, the flow looks like this:
- open VPC firewall;
- create a rule;
- allow the required UDP port;
- apply it to the right VM / target tags / network.
This is one of the most common reasons why something in GCP looks “installed correctly” but still does not accept outside connections.
Which ports should you choose?
There is no universal “best” port here.
A practical approach looks like this:
For the first deployment
- pick one clear UDP port;
- open it at the cloud firewall / security group / NSG / VPC firewall level;
- use that same port in the setup and keep the first deployment simple.
If it does not work
Check things in this order:
- is the port open at the provider level;
- did you select the right protocol;
- did you paste the correct key;
- is the username correct;
- are you using the public IP instead of an internal one;
- is it time to just switch the port.
If you want the fastest way to rule out a network-level issue, the most useful step is often simply trying a different UDP port.
Common mistakes
Mixing up the public key and private key
The most common failure.
The simple rule:
.pub→ goes into the provider panel- without
.pub→ goes into Amnezia
Wrong username
On DigitalOcean, this is usually root, but on AWS, Azure, GCP, and different VM images that may not be true.
UDP port not opened
The server may install correctly, but outside traffic will not get through.
Using the wrong IP
Amnezia needs the public IP, not the VM’s internal address.
Tweaking settings too early
If the basic connection still does not work, do not start tuning everything right away. First get a normal working connection.
What to do next
Once you have your first working AWG2 server, the logical next topics are:
- AmneziaWG2 settings
- comparison of AWG2 vs WireGuard vs VLESS Reality
- quick VLESS Reality setup
- routing through Cloudflare WARP
- more advanced server-side scenarios
So this article is the entry point: how to quickly launch a working self-hosted AWG2 setup, not a full course in VPN server administration.
Short summary
If you want the quickest practical path, it is this:
- create a VPS;
- get SSH access;
- add the public key on the provider side;
- paste the private key, IP, and username into Amnezia;
- choose Manual → Amnezia WireGuard;
- set the port;
- wait for the installation;
- connect;
- verify the IP.
On DigitalOcean, this is the most direct and visual path. On AWS and Azure, the portal may simplify key generation. On Google Cloud, the confusion is usually around the SSH model and VPC firewall rules.
But if you keep three things in mind — the correct key, the correct username, and an open UDP port — the initial self-hosted flow becomes very simple.